


Five Easy Steps to Better Photos: A Simple Weekend Project for Beginners
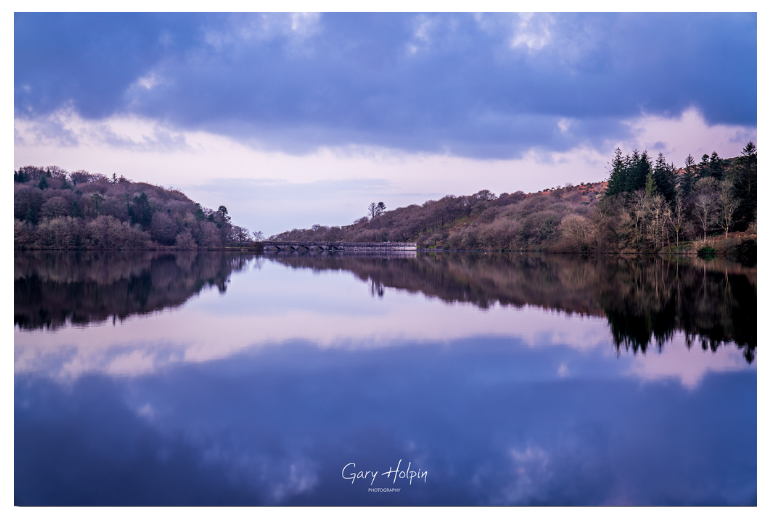
If you’re starting out with landscape photography, it’s easy to assume you need more kit, more complicated settings, or huge amounts more technical knowledge before your photos will improve. In practice, the biggest gains usually come from choosing a better subject, visiting in better light, and taking a little more time to improve your composition. The good news is that all of this can be done with the camera left on auto, so you can keep things simple and focus on seeing the scene properly.
So, here’s a straightforward weekend project which involves picking a location that works, visiting near to sunset when the light is good, and working through some of the key composition rules. Done well, a calm evening with decent light at a good location is often enough to come away with noticeably better photos.
1. Choose a subject that works
Not every view makes a good image, even if it looks lovely in person. A strong photo usually needs one clear subject, or at least one key focal point that gives the picture a reason to exist. On Dartmoor, that might be a distinctive tor, a lone tree, a church on a hill, a stone circle, or a bridge.
A useful habit is to look at what local photographers are sharing on social media and ask yourself why those scenes work. You are not trying to copy anyone’s picture, just training your eye to notice what makes a location worth stopping for. For example, on Dartmoor Great Staple Tor, Nun's Cross Farm, Brent Tor, and Scorhill stone circle are all the sort of places that you will see time and time again on social media because they work photographically as they give you obvious subjects / focal points to work with.
2. Go when the light is nice
Light does most of the heavy lifting in landscape photography. A familiar view can look flat in the middle of the day with harsh light, but far more interesting later on, when the sun is lower and the shadows start to shape the land. For a beginner, the evening golden hour (the hour before sunset) is usually the easiest and most rewarding time to shoot.
That softer late light brings out texture in rock, grass, and stone, and it tends to make the whole scene feel calmer and more three-dimensional, and the golden light adds beautiful tones to the landscape. If you can plan your outing for the hour or so before sunset, you will usually give yourself a much better chance of coming away with usable images.
3. Pick a location with an easy light direction
When you are learning, it helps to make life easy. One simple approach is to choose a location where the setting sun is behind you or slightly to one side, lighting the landscape in front of you rather than shining straight into the camera. That keeps contrast under control and makes it easier to get a balanced exposure without worrying too much about having to bracket (take multiple exposures and blend them) or needing heavy editing.
On Dartmoor, that could mean choosing an open viewpoint where the evening light falls across the scene from behind you or slightly to one side. Well-known locations such as Great Staple Tor, Haytor, Brentor, Sharpitor, Sheepstor, and areas around Burrator can all work well for that sort of setup, depending on the time of year and exactly where the sun is setting. A sun-tracking app such as The Photographer’s Ephemeris is very useful here, because it helps you check the direction of light before you even leave home.
4. Spend time on composition
Once you have a decent subject and good light, slow down and look around properly. Move a few steps left or right, crouch down, try a higher viewpoint, and see how much difference the foreground makes. Often the strongest photo is not the first obvious one, but the version you find after a few minutes of exploring the scene.
A few simple composition ideas go a long way:
Put the main subject / focal point off-centre using the rule of thirds.
Use a path, wall, stream, or fence line to lead the eye into the frame. If possible place it so that it moves into the frame from a corner and points towards the main subject.
Include a foreground object to give the picture depth, but be careful that it's no so dominant as to dominate the main subject.
Make sure the horizon is level and think about where to place it using the rule of thirds (upper third if the sky is boring, lower third if it's more interesting)
If the scene feels cluttered, try to simplify it by changing your position to eliminate clutter.
Don't just try one composition and head for home, spend a good hour moving around the scene trying different compositions while the light slowly changes.
5. Do a simple edit afterwards
Editing does not need to be complicated. A few small adjustments can make a big difference: straighten the image, lift the exposure slightly if needed, pull back any bright highlights, open up the shadows a little if the foreground is too dark, and check that the colours still look natural. If you are using a phone, free apps such as Snapseed, Google Photos, or Lightroom Mobile are more than enough for this stage. On a laptop, free options such as Photopea or Darktable will also handle simple edits very well.
You can also crop the frame if it helps tighten the composition, remove small distractions, and add a very light touch of contrast, clarity, or structure if the image needs it. A subtle vignette can work too, but only if it helps keep the eye on the subject. The aim is to finish the photo, not rescue it. If the picture already has a good subject, nice light and a sensible composition, editing should only be doing modest housekeeping.
A simple weekend project
If you want to make this into a proper weekend exercise, keep it very straightforward. Pick one location from your list, go out about an hour before sunset, and give yourself permission to stay in one small area rather than trying to cover too much ground. Spend the first few minutes just looking and thinking what might work, then take some time shooting a number of frames using slightly different compositions, watching as the light slowly changes towards sunset.
The main thing is not to overcomplicate it. If you can find one subject, wait for decent light, compose carefully, and make a small edit afterwards, you will already be doing more than many beginners. That is often the point where photos start looking more deliberate images, and less like quick snapshots.
Most of all, enjoy being there. Even if you do not come home with a great photo, it is still time well spent — and if you follow these simple steps, the chances are you will.
Landscape Photography for Beginners - now as a pdf download!
You may already be aware that in 2025, my Landscape Photography for Beginners book was released on Amazon as a paperback. It has been a lovely way to share what I’ve learned in the field over the last 20 years, but I know a lot of you prefer to read on a tablet or laptop rather than adding another book to the shelf. Thanks to Amazon taking most of the sale price, the paperback edition is also sadly quite expensive.
So, I’ve now created a digital edition that you can download directly from my website. It’s the same content as the print version, presented as a high‑quality, screen‑friendly PDF with full‑colour images and double‑page photo spreads kept intact. The e-book is designed to take you from “point and hope” to taking deliberate, confident landscape photos, with clear explanations, simple settings that actually matter, and plenty of examples from real locations. If you’d like a copy, you’ll find it in the shop section of my site HERE, ready to download and keep as a reference for your next outing.

About Gary Holpin Photography
As a professional photographer based in Devon, my journey began along the stunning South West Coast Path. Disappointed with my initial attempts to capture its beauty, I embarked on a second 630-mile journey, this time dedicated to mastering photography. Today, I'm a nationally acclaimed photographer with award-winning landscape photos.
I specialize in providing top-notch property photography, business photography, and drone photography services to businesses across the South West. Additionally, I offer comprehensive photography training courses tailored for both businesses and individuals. Whether you're looking to enhance your corporate image or improve your personal photography skills, my training programs are designed to help you capture stunning images.
As an award-winning and widely published photographer, I frequently share my passion for photography and Devon through engaging talks at local camera clubs and community groups. My expertise spans the entire South West region, ensuring that clients from Devon, Dorset & Somerset benefit from high-quality photography services and training.
