
Blending Short and Long Exposures for Sharp Subjects and Silky Motion
- Gary Holpin
- Jan 13
- 5 min read
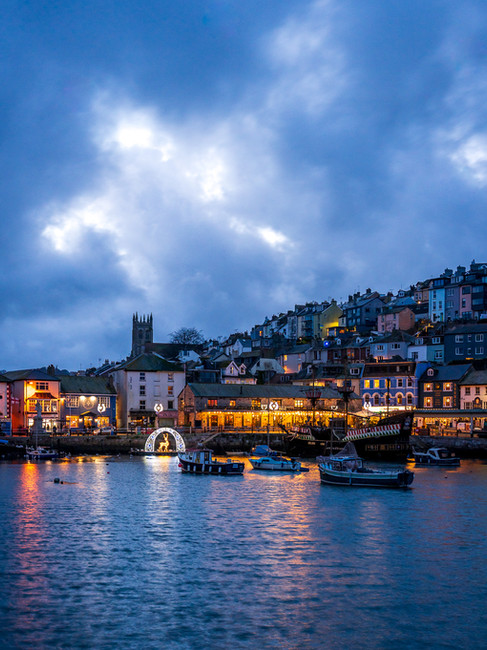
Last weekend I did a sunset shoot at Brixham Harbour and as it was windy the boats on the water were moving around in the wind. Whilst I was considering what type of shot to take I weighed up the two main options: I could use a short exposure to keep the boats sharp (but this would also keep the ripples on the water and the cloud structure in the sky), or I could use a long exposure to get that dreamy blur in the water and clouds, but this would also leave blurred boats in the scene. In the end I took both types of photo with the intention of blending the shots in Photoshop in order to get the best of both worlds.
At first glance, blending a sharp frame with a long‑exposure frame in Photoshop might sound like something only advanced users would attempt. In reality, it’s a surprisingly straightforward process once you break it into a few simple steps.
This step‑by‑step walkthrough will show exactly how to shoot a short exposure to freeze boats, a long exposure to blur water and clouds, and then combine them cleanly in Photoshop to create a final image with crisp boats and beautifully blurred movement. Obviously to follow this you need to have Photoshop, so apologies if this doesn't apply to you; hopefully you will still find it interesting to see how these two types of shot were blended to meet my creative vision for the shoot.
Capturing the short and long exposures in‑camera
To capture the short and long exposures to blend later, the process was as follows: The camera was mounted firmly on a tripod and set to Manual mode so that shutter speed, aperture and ISO could be independently adjusted. I was shooting in Raw file format to allow the most flexibility in editing later.
The long‑exposure frame came first: the aperture was set to f/8 and ISO to 100, then a 6‑stop ND filter was added to the lens and the shutter speed extended to 30 seconds (see here for more about ND filters) - this combination produced a 'good' exposure as shown by the camera's light meter. This produced the shot on the left below, with smooth, blurred water and clouds, but also blurred boats on the water (see zoomed in version below).
Without touching the composition, the ND filter was then removed to capture the sharp frame. The aperture was kept at f/8, but the ISO was raised to 800 and the shutter speed shortened to 1/100s. Again, this combination gave a good balanced exposure as shown by the light meter. These settings were enough to freeze the boats cleanly, giving a crisp version of the scene (see right hand photo below) that could later be combined with the long‑exposure shot for the best of both worlds.


Blending the long and short exposures in Photoshop
Now the two exposures had been captured, it was time to head for home and combine them. Below are the key steps that were taken to do this:
1. The two raw files were opened in Adobe Lightroom (Develop Module) and basic adjustments were made to one of the images (basic exposure, highlights, shadows, cropping, verticals straightened etc) and then the same changes made to the other (using settings -> copy settings on one image, then settings -> paste settings on the second image). This ensures that both images are similar which helps with the blending later
2. Both images are selected on the Develop module thumbnail view at the bottom, then right mouse click to reveal options. From here, 'Edit in' is selected then 'Open as layers in Photoshop'. See
screenshot below, which shows all these steps.

3. This now opens the two images in Photoshop as layers. The screenshot below shows the two layers, with the short shutter speed shot (crisp boats) on the top, and the longer exposure (blurred water and clouds) below.

4. With the top layer highlighted (as shown above), next we add a layer mask by hitting the layer mask icon at the bottom of the layers panel. This adds a white layer mask to the top layer (see below). A layer mask essentially controls which parts of the bottom layer show through to the top layer. White suppresses information from the bottom layer, so at the moment none of the bottom layer shows through. Next we will add black areas to this mask, which essentially allows information through from the bottom layer, in areas chosen by us.

5. We now go to the main image panel in Photoshop, where we start with seeing just the top layer (the short exposure with sharp boats). We now press 'B' to select the brush tool (the mouse pointer changes to a circle as shown below) then press 'X' until the black square is in front of the white square on the left hand menu (also as shown below). This means you have selected a black brush. You can change the size of the brush using '[' and ']' on the keyboard if required. Finally ensure that the 'Opacity' on the top menu is set to 100%.

6. Ensuring that the white mask is selected in the layers panel, we now proceed to use the black brush to selectively allow through information from the bottom layer in the areas where we want it to show; namely in the water of the foreground, and in the sky. The image below shows where this process has been done on the bottom of the frame. You will see the smooth water from the bottom layer is starting to show through onto the top layer.

7. This process is continued for the rest of the water around the boats, as well as for the clouds in the sky. This needs to be done carefully especially around the boats, so as not to bring through any blurred boat from the bottom layer. If necessary, CNTRL+Z will undo any unwanted brush strokes. The image below shows the final result, with crisp boats, blurred water and smooth skies, which was the creative result that I was looking for.

8. Finally use File - > Export to export the new image as a new PNG file, which can be reimported into Lightroom (or another editor) if any final editing is required.
Final Words
If you're looking to perfect your long exposure photography on scenes where things are moving where you wish they weren't (like the boats in this example) then hopefully this blog will help to demonstrate that there is a solution! If you're new to Photoshop this may seem complicated, but hopefully the step by step guide will help you get started.
Want some help improving your photography skills?
Don't forget that if you want some direct help with your photography, I offer a range of 1-2-1 photography courses for Devon based folks. If you're not nearby then I also offer residential workshops for beginner photographers or improving photographers.

About Gary Holpin Photography
As a professional photographer based in Devon, my journey began along the stunning South West Coast Path. Disappointed with my initial attempts to capture its beauty, I embarked on a second 630-mile journey, this time dedicated to mastering photography. Today, I'm a nationally acclaimed photographer with award-winning landscape photos.
I specialize in providing top-notch property photography, business photography, and drone photography services to businesses across the South West. Additionally, I offer comprehensive photography training courses tailored for both businesses and individuals. Whether you're looking to enhance your corporate image or improve your personal photography skills, my training programs are designed to help you capture stunning images.
As an award-winning and widely published photographer, I frequently share my passion for photography and Devon through engaging talks at local camera clubs and community groups. My expertise spans the entire South West region, ensuring that clients from Devon, Dorset & Somerset benefit from high-quality photography services and training.
