
Composition Rules in Depth: Use the Rule of Thirds
- Gary Holpin
- Mar 11, 2025
- 8 min read
Updated: Mar 21, 2025
Those of you who followed my series of blogs on 'The ten ingredients of great landscape photos' will know that composition comes very high up the list! Those of you who have attended any of my training courses will also know that I always teach composition as the first topic. Why? Because learning the art of composition is the most important skill for any developing photographer; in fact, simply by mastering composition, you can hugely improve your photos with any camera. It's for this reason that, in this series of blogs, we're looking in depth at the art of composition.
The ingredients of great landscape photos
Other than finding a great subject to photograph, composition is the next most important factor in any great landscape photo.

What are composition rules?
I firmly believe that understanding and improving your composition is the quickest and easiest way to improve your photos, whatever camera you use. This is why it’s the topic that I always cover first in all of my training courses, both for mobile phone users and DSLR camera users
Why do snaps so rarely do justice to a beautiful view?
I'm sure we've all stood looking at a beautiful view, pointed our camera at it and snapped the shutter, only to get home and realised that whilst the view was beautiful, the photo is just plain dull! The reason for this is that we are used to seeing with our amazing binocular vision which sees the world in in three dimensions. As soon as we lose that third dimension in creating a two- dimensional photo, this view can immediately lose its essence. Put simply, a two-dimensional representation of a beautiful view can often be boring!
So, how do we make photos of beautiful views interesting?
To make a two-dimensional landscape photo more interesting, it's necessary to use one or more tricks, to build interest into the image. In a 'point and shoot’ snap of that beautiful view, there is likely to be little to grab the interest of the viewer, and they are more than likely to glance at it and then look away (which equals boring!). Instead, to develop as a photographer, you need to move away from taking a snap and move towards composing an image which grabs the viewers’ attention, pulling them into, and through the photo. This journey forces them to look longer at the photo, and in doing so, makes it more interesting to look at.
One of the easiest ways of improving that photo is to use one or more little tricks, often called ‘composition rules’ to make the image more interesting to look at and help to do better justice to that beautiful view. Although there are loads of composition rules (just Google it and you will find hundreds!), below are a handful of what I believe are the most powerful ones to have in your mental checklist when composing a photo.
Ensure you have a focal point
Construct your frame using the rule of thirds
Utilise lead-in lines to help draw the viewer into the frame
Use layers to help give depth
Find foreground interest especially when shooting wide
Embrace symmetry
Provide a sense of scale
Use the rule of odds
Keep your edges clean
Embrace diagonals
Use negative space
Ensure balance
Over this series of blogs, we'll look in detail at each of these 'rules' to help equip you with a mental checklist for how to compose better landscapes. We start this week with looking at the importance of having a focal point.
Composition Rule Number 2: Use The Rule of Thirds
The rule of thirds is one of the most fundamental compositional techniques in landscape photography. By dividing your frame into nine equal sections using two vertical and two horizontal lines, you can position key elements in a number of ways to help create balance and visual interest in your photos. While this rule applies to various photography genres, it’s especially effective in landscape photography.

Why Does the Rule of Thirds Work?
Although the temptation for beginner photographers is to place the main subject and focal point of their image (for example a person, or a lighthouse) right in the centre of their photo, this is NOT the best thing to do if you want to make your photo interesting to look at. The simple fact is that people instinctively prefer compositions which follow asymmetrical balance over strict symmetry (except in cases of intentional symmetry like reflections - but we'll come to that later!). The reason for this is that the ratio provided by the rule of thirds is an approximation for the 'golden ratio', which is a mathematical proportion that appears frequently in nature; from flower petals to galaxies. It’s considered aesthetically pleasing because of its natural harmony and balance.
Applying the Rule of Thirds
There are a number of ways that the rule of thirds grid can be used when composing your photos:
Placing Key Subjects or Focal Points on Verticals
If your composition includes a tree, a person, or a lighthouse as a main subject and focal point, placing them on either of the two verticals can be more visually pleasing than placing that subject in the middle of the image. Placing smaller subjects at any of the key intersection can be particularly powerful in composition terms.
In the image below, the church ruin has been placed on the right hand vertical of the rule of thirds grid (the top of the tower is on the bottom right intersection point), producing a more visually interesting image than if the ruin had been placed centrally in the frame.

Positioning the Horizon
Placing the horizon straight down the middle of an image can make it feel static; instead it is normally best to place the horizon either along the top or the bottom horizontal line of the rule of thirds. The best way to decide which is most appropriate is using the following rules of thumb:
Sky most interesting: Place the horizon on the lower third if the sky is dramatic (e.g, sunsets, cloud formations)
Sky not interesting or foreground most interesting: Position the horizon on the upper third if the foreground or terrain is more compelling than the sky (see image above)
As with all composition rules, there can be good reasons to break the rules. In the image directly below, the castle has been placed on the right hand vertical of the rule of thirds grid, however, because both the sky and foreground were equally interesting, I have chosen to put the horizon straight down the middle of the frame.
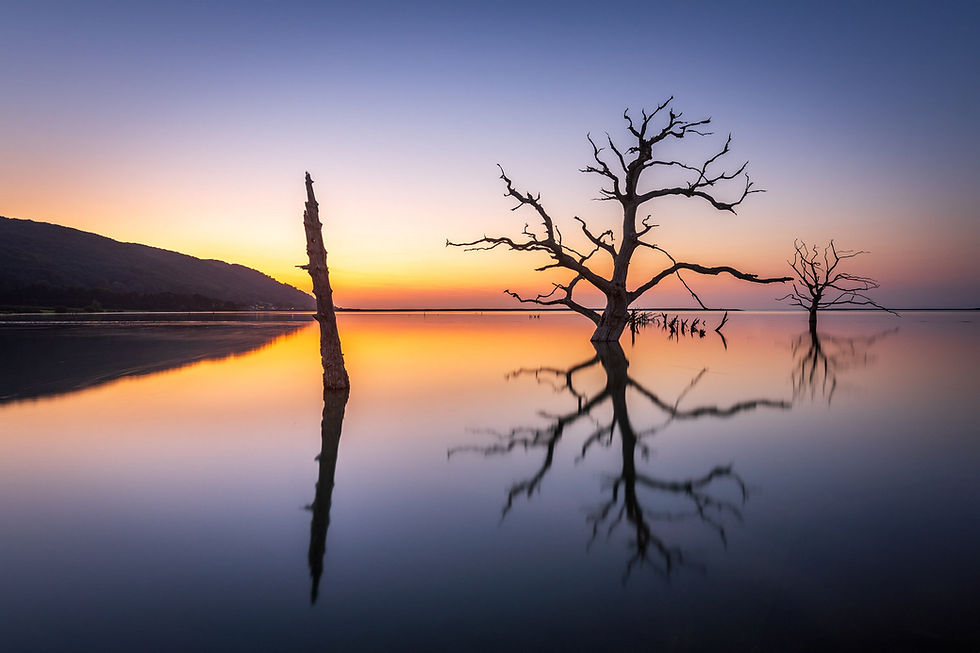
In the second image, where we have a completely symmetrical scene, it is almost always better to make the most of this symmetry and place the horizon directly down the middle of the frame.

Build Layers of Interest to Give Depth
The three layers provided by the rule of thirds grid help you to think about your composition in layers. Ensuring that you have foreground interest, midground interest, and background interest can help in giving your image a feeling of depth (something that a scene often loses when converted from a 3-dimensional world, into a 2-dimensional photo.
In the drone shot below, the main subject and focal point is the castle which is in the middle layer (located on the left hand vertical of the rule of thirds). I have included the trees to provide interest and texture to the foreground, and the sky provides a background layer. As there were no clouds, I have placed the horizon on the top horizontal of the rule of thirds, as the foreground was more interesting than the sky.

The Grid as a Guide to Balance
A further use of the rule of thirds grid is to help in ensuring balance in the construction of the image. If an object is just poking into the corner of the frame, it can seem as if it is accidental and can be distracting. If an object fills too much of the frame, it can overwhelm the composition and be too dominant. Composing your image so that the object roughly fills one of the 9 boxes of the grid can ensure that it feels a harmonious part of the composition and balances well with the other elements.
In the example below, the right image has the clump of flowers just poking into the frame. The flowers feel overwhelmed by the amount of negative space around them and the image feels unbalanced. In the left hand image, the flowers approximately fill one of the rule of thirds boxes. This image feels more balanced and harmonious.

Leading Lines
Finally, leading lines (a subject we will cover in the next blog in this series) — such as rivers, roads or paths, can be aligned with the rule of thirds to help guide the viewer’s eye into the photo. Positioning these elements along the rule of thirds grid lines helps create a harmonious and visually engaging scene.
When to Break the Rule of Thirds
Though effective, the rule of thirds isn't a strict rule—it’s a guideline. Some compositions naturally benefit from symmetry, central framing, or unconventional placements:
Minimalist landscapes: A centred subject can create a sense of solitude and stillness.
Reflections: Perfect symmetry can make a centred horizon more powerful.
Extreme wide angles: Leading lines and strong foreground elements can override the need for strict adherence to the grid.
Practical Use of the Rule of Thirds
Show the grid on your camera
Most cameras (and mobile phones) have an option to show the rule of thirds grid on your display screen (and the viewfinder), which helps you to use the grid when composing images.
Modify your use of the rule of thirds in post processing
Many editing tools, like Lightroom allow you to overlay the rule of thirds grid. Cropping your image in post processing can refine composition by adjusting the positioning of key elements to ensure they align properly with the grid.
Use in conjunction with other composition rules
Combining the rule of thirds with other composition techniques, such as leading lines or layering, can help you to create more dynamic and interesting compositions that your viewers will want to explore.
Want to improve your photography skills?
Don't forget that if you want some direct help with your photography, I offer a range of 1-2-1 photography courses for Devon based folks. If you're not nearby then I also offer residential workshops for beginner photographers or improving photographers.

About Me
As a professional photographer based in Devon, my journey began along the stunning South West Coast Path. Disappointed with my initial attempts to capture its beauty, I embarked on a second 630-mile journey, this time dedicated to mastering photography. Today, I'm a nationally acclaimed photographer with award-winning landscape photos.
I specialize in providing top-notch property photography, business photography, and drone photography services to businesses across the South West. Additionally, I offer comprehensive photography training courses tailored for both businesses and individuals. Whether you're looking to enhance your corporate image or improve your personal photography skills, my training programs are designed to help you capture stunning images.
As an award-winning and widely published photographer, I frequently share my passion for photography and Devon through engaging talks at local camera clubs and community groups. My expertise spans the entire South West region, ensuring that clients from Devon, Dorset & Somerset benefit from high-quality photography services and training.
